

DynaGard Installation and Application Procedure
Download these Instructions as a PDF!
Preparation
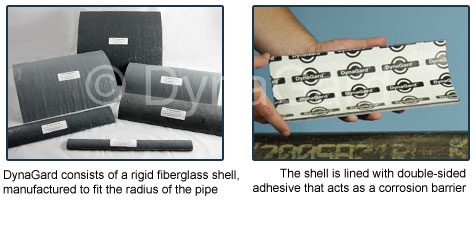
It is important that the DynaGard fit well. When ordering DynaGard, the outside diameter of the pipe to be protected should be included along with the length of DynaGard required to fully isolate the pipe from the support, or sleeper, with approximately 2” of overlap at each end. The recommended radius of individual DynaGards ranges from 60º to 150º and is a function of the diameter of the pipe to be protected and the degree to which the pipe is expected to move once the DynaGard has been installed.
Prior to installation, the dimension of the DynaGard should be checked against the pipe and the support to confirm the fit.
Installation Procedure
Step By Step Installation Instructions
DynaGard serves as a corrosion barrier by isolating the pipe from its support. DynaGard consists of a fiberglass shell which has been lined with DGB, a double-sided, high bond strength adhesive layer that is protected by a plastic, release liner for “peel and stick” applications in accordance with the following installation procedure.
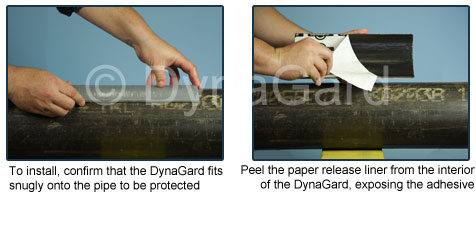
1. Without removing the plastic release liner, which protects the DGB adhesive layer, place the DynaGard on the pipe to confirm that the DynaGard fits snugly.
2. Raise the pipe off the support to the extent required to facilitate placement of the DynaGard between the pipe and the support. Care should be taken to raise the pipe at a perpendicular angle to the support so that when the pipe is lowered it will not “slide” across the support.
3. Use a wire brush to remove any loose scale or other material. Then clean the pipe using a 50:50 mixture of isopropyl alcohol and water. Wipe clean and inspect for any anomalies such as raised surfaces that would prevent the DynaGard from fitting snugly against the pipe. Contact a certified DynaGard Installation Superintendent if the there is an anomaly that cannot be removed. The pipe should be wiped dry if there is any moisture forming on the pipe before application of the DynaGard.
4. If the pipe is acceptable, peel the release liner from the interior of the DynaGard.
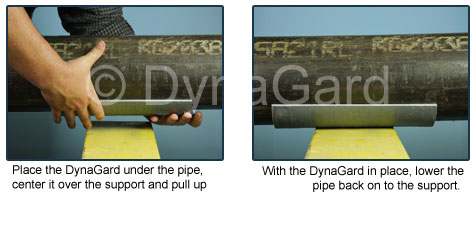
5. Place the DynaGard under the pipe and center it over the support, making certain that the DynaGard shell extends at least 2” beyond the support on each side. Standing over the pipe, with a hand at each end of the DynaGard, pull the DynaGard up and into contact with the pipe, taking care to center the DynaGard at the 6PM position on the pipe. Note that in the case of larger diameter pipes, it may be necessary use a ratchet strap in order to pull the DynaGard tightly against the pipe.
Likewise, a rubber mallet may be applied to the outside of the DynaGard, in particular to the outer edges, to ensure that the DynaGard adhesive has contacted the pipe.
6. With the DynaGard in place, lower the pipe back on to the support.
7. Once the full weight of the pipe rests on the DynaGard, any voids or cavities between the pipe and the fiberglass shell portion of the DynaGard that might collect moisture should be filled with silicone putty.
8. Although not necessary, DynaGard is chemically resistant and the fiberglass shell can be painted if desired.
Note: if the pipe is expected to move more than an insignificant amount once the DynaGard has been installed, Riserclad International, Inc. should be contacted prior to installation to determine if the radius of the DynaGard is sufficient to provide the necessary adhesion.
Copyright © 2009 TOPCOR Offshore, LLC. All Rights Reserved.